Film Restoration - Comparing Analog Capture to Digital Capture
There are several ways to restore film that has been captured digitally. Obviously the better the original capture, the better the end result will be. A lot can be done with your NLE of choice, I use Sony Vegas Pro with additionally purchased plug-ins. The below photographs show what can be done with Sony Vegas and a photo editing program such as Photoshop (in its various forms) or any other photo editing software that has cloning and healing capabilities. It is labor intensive but you can limit what you do and work on worse case scenarios. For restoration on a grander scale I also use may other open source tools that can be found on the internet. VirtualDub is one of my favorites and allows me fix the film prior to ingesting it into my NLE.
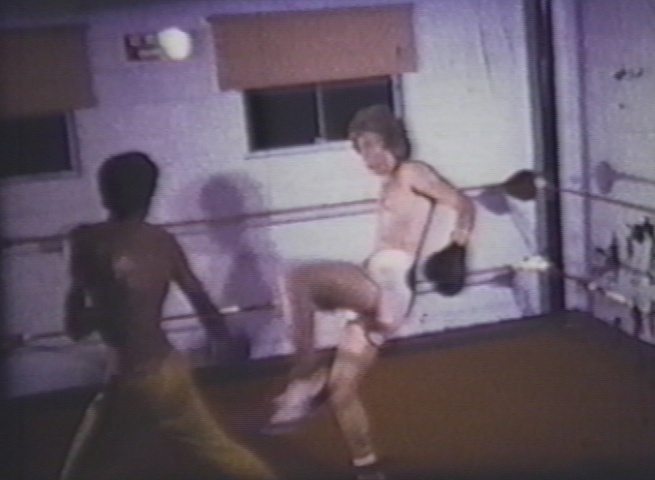
This is a frame grab from a 1976 Super 8 film. This is exactly as it was captured from the the old method of projection onto a screen and video taped on a VHS camcorder. This was captured in the late 1980s. Comparing it to the digital captures below you will notice this image is missing detail and has a smaller image area (not all of the filmed image has been captured). Visible in the picture are scratches and on the right there is some mold embedded into the film.
__________
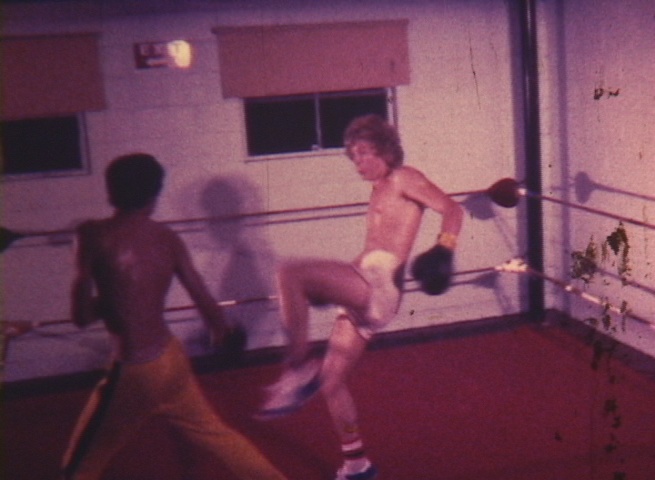
Digital Capture 2009
This is the same frame as shown above in the VHS capture but captured digitally. This is exactly as it was digitally captured from the film. You can see the shift in color to red that has occurred over the years (compare to the VHS capture above done 20 years earlier) . There is also considerable grain and although the film was been cleaned the embedded mold cannot be physically removed from the film.
__________
For digital capture the film projector has been modified to enlarge the gate so more of the filmed image can be seen. The the image is projected directly onto the camera CCD (not onto a screen). Notice that the mold can now be seen very clearly and it is obvious that the mold is on top of the film. Now you can ready easily the Exit sign in the upper left portion of the picture.

Digital Capture with Fixes Applied
Digital Capture with Fixes Applied
This is the same image with phase 1 of the restoration complete. The grain has been removed and the color corrected to give a more natural appearance. The shadows were highlighted to improve the picture without creating an unpleasant appearance to the overall image. Notice there has been a slight loss in sharpness as a result of the correction process. This will be gained back later in the process.
__________

Digital Restoration Complete (1976 Super8 color film)
The final phase of restoration using computer graphics has digitally removed the mold and scratch marks that have occurred over the years and as a result of dozens of projections. This is a labor intensive process requiring hours of work for a few seconds of film. Notice the sharpness of the image has returned, the mold and scratches have been removed and nothing remains in the image to distract the viewer from the action taking place.
It would be a lengthy process to fix the entire film in this manor so most people opt for repair of extreme damage or an important area of the film. Unless of course they are using other tools that can help automate the repair process.
__________
Mold and Scratches Visible
__________
Final Restored Version

The above image is before (left) and after (right) of automated film restoration using AviSynth and VirtualDub. After the above reprocessing I ingest the file into my editor and continue the restoration process. Notice the hair that was captured during the VHS capture process is almost completely removed and will not be noticed in the final video.
The key to successful restoration is to have the right tools for the job and don't be afraid to make use of the free tools available through open source. You will need to take the time to learn them and that isn't always easy, but it does pay off in the end.
Follow this Link to see another example of film to video restoration.